
Warplet is a macOS app that connects hosted AI clients like ChatGPT, Claude, Perplexity, and Grok to MCP servers running locally on your Mac. No port forwarding or cloud hosting is required. It opens a secure tunnel and gives you one URL per local MCP server to paste into any AI client.
Obsidian doesn't ship its own MCP server, but the community plugin Local REST API with MCP adds one, running locally on your Mac. Warplet can expose that local server to hosted AI clients the same way it does for DEVONthink or Home Assistant. This guide walks through installing the plugin, finding its MCP URL, and connecting it in Warplet.
1. Install the Local REST API with MCP plugin
In Obsidian, open Settings → Community plugins → Browse, then search for Local REST API with MCP (by Adam Coddington). Click Install, then enable it.
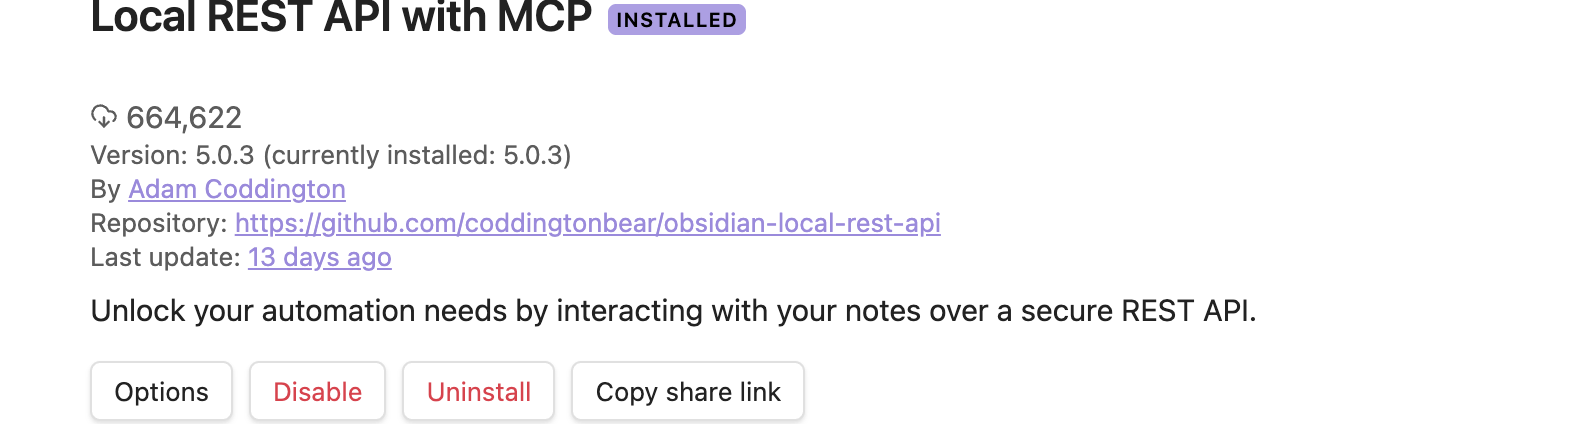
2. Find your MCP endpoint URL
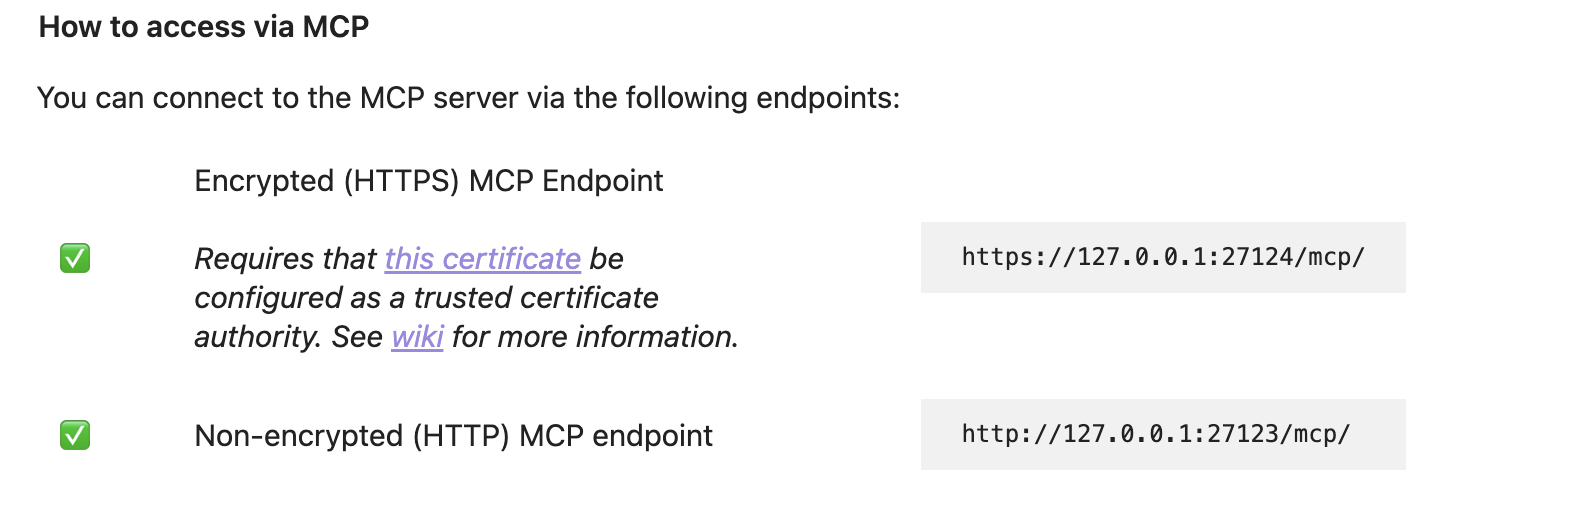
Open the plugin's settings page (Settings → Community plugins → Local REST API with MCP). Scroll to How to access via MCP. You'll see two endpoint URLs and an API key:
- Use the non-encrypted (HTTP) MCP endpoint,
http://127.0.0.1:27123/mcp/, unless you've set up a trusted certificate for the encrypted one. - Copy the API key shown just above the REST section. You'll need it in the next step.
3. Add Obsidian as a server in Warplet
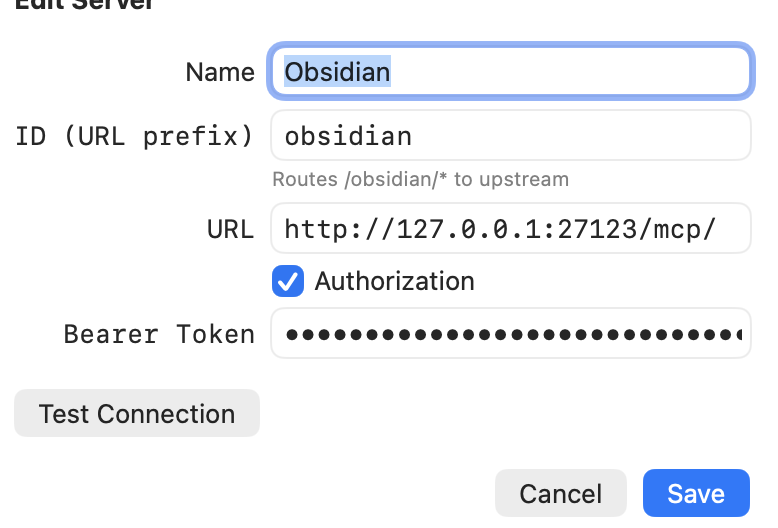
Open Warplet and click Manage Servers, then the + button to add a new server. Fill in:
- Name:
Obsidian - ID (URL prefix):
obsidian - URL:
http://127.0.0.1:27123/mcp/ - Authorization: check this box and paste the API key you copied from the Obsidian plugin settings into Bearer Token
Click Test Connection to confirm Warplet can reach the plugin, then Add.
4. Copy your Obsidian URL and connect an AI client
Back in the main Warplet window, your Obsidian entry now appears under Use these URLs to connect your favorite LLM. Copy that URL.
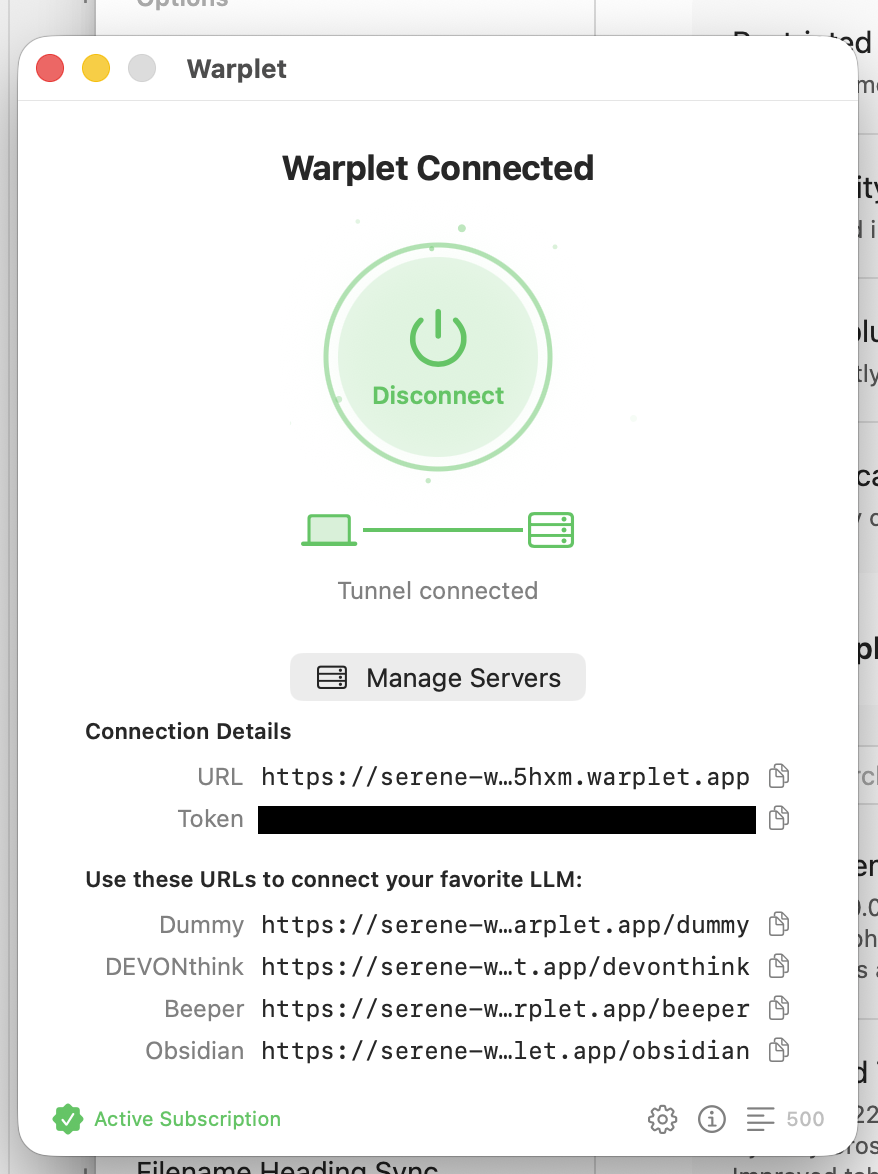
Add it as a custom connector in your AI client of choice, using the same steps as any other Warplet server:
- Connect Warplet to ChatGPT
- Connect Warplet to Claude
- Connect Warplet to Perplexity
- Connect Warplet to Grok
- Connect Warplet to Grok Bot
- Connect Warplet to Gemini
When the client asks you to authorize, paste the Warplet bearer token. Do not use the Obsidian plugin's API key here; that one stays inside Warplet's server config from step 3.
What the connector can do
The AI client can list, read, search, create, and patch notes in the vault currently open in Obsidian. The available tools depend on the plugin version.
The plugin can modify notes. Confirm that reading and searching work before asking the client to create or patch anything.
For worked examples of what to ask once it is connected, see Use your Obsidian vault from ChatGPT.
Troubleshooting
- Every request returns
401. Reauthorize the AI connector with the current Warplet bearer token. If the error continues, update the server's Authorization field with the current Obsidian plugin API key. Reinstalling the plugin changes this key. - The client connects but finds no tools. Open Obsidian, load the vault, and make sure the plugin is enabled.
- The server is offline. Wake the Mac and confirm that Warplet is connected.